Home Improvement

Graber Custom Blinds and Shades

Custom Blinds and Shades KY offer a wide range of colors, fabrics, textures and styles. Expert will help you select the options that best complement your home’s decor and style.

Blinds

Unlike ready-made window treatments, custom blinds are made to order and built to last. That means they’re better in quality, safer for children and reduce waste.

Blinds have horizontal slats that can be raised, lowered and tilted to control the amount of light entering a room. They are available in a variety of colors, textures and styles to suit your decor. Blinds are durable and easy to clean, and can offer privacy, security and light filtration in addition to style.

Shades have a more flexible open-and-close operation. They are crafted of soft fabrics that come in various colors, weaves and opacities to match your decor while providing privacy, light filtration, energy savings and sun protection. Some shades fold like an accordion or use a roller to provide a sleek, modern look. Others have a solid piece of fabric that can be rolled down to the window sill and are easily motorized.

Choosing between custom blinds and shades depends on your preferences, functionality and budget. Blinds are less expensive than shades, but both have unique benefits that can improve the overall value of your home.

Off-the-shelf blinds are made in a limited number of standard sizes and are designed to fit most windows, so they’re not ideal for every home. They can be a good choice for a quick fix, but they’re usually not as effective at managing light or creating privacy as custom-made window treatments.

Custom blinds are manufactured to your exact window size, so they offer better light management and a more precise fit. Many of our blinds and shades are available in a cordless option that’s child and pet-safe. The cordless LiteRise system uses an ergonomically designed wand that allows you to raise and lower your window coverings without the need for a cord. For a more sophisticated option, consider our PowerView+(tm) Automation that lets you control your blinds and shades with an app on your smartphone or tablet.

Both blinds and shades can be customized with an optional liner that blocks out heat, glare and UV rays. The liners can be sewn into the fabric or, in some cases, can be added separately. They’re particularly useful for west-facing windows or in a room with a lot of sunlight that can cause fading of furnishings and fabrics.

Privacy

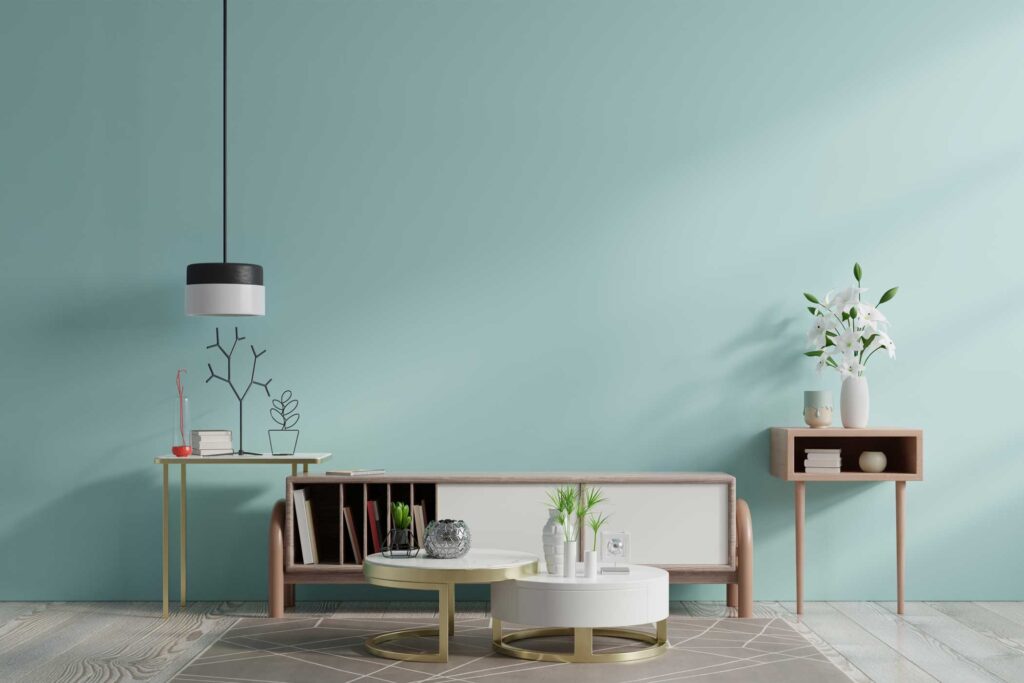
Custom blinds and shades aren’t just about covering windows, they elevate the aesthetic of a space and offer a high level of precision when it comes to light control and privacy. The sheer amount of options available means that there is truly a style to suit every taste, whether it’s sleek and modern, traditional or somewhere in between.

The beauty of choosing the perfect window treatment is that they can be tailored to fit your exact needs and preferences. That’s especially true when it comes to opacity. Sheer and semi-sheer fabrics are ideal for spaces where you aren’t concerned about people seeing in, like living rooms or dining areas. On the other hand, room-darkening and blackout fabrics are ideal for bedrooms or media rooms to help ensure a restful sleep environment.

To address this, Hunter Douglas offers multiple opacity options across their Pirouette, Silhouette and Luminette shade styles. Each has their own fabric selections, opacity levels and pleat sizes, making them the perfect solution for any space in your home.

In addition to light filtration and privacy, many of the shades we carry also offer energy savings, helping to cut your heating and cooling costs all year long. That’s especially the case with our Bali cellular shades, which are specially designed to trap hot and cold air between your window and the outside, giving you big savings on your energy bills.

The energy efficiency of our shades can even be boosted with a layer of insulating foam, which will help your windows to retain heat in winter and cool in summer. This can add up to significant savings on your energy bills over time, making them a smart investment for any home.

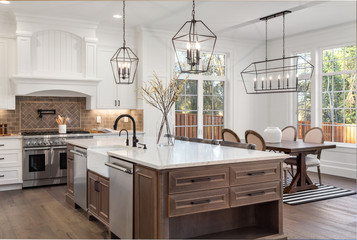
Blinds and shades come in a wide variety of textures, colors and styles, giving you the freedom to choose a look that suits your taste. The most important factor when it comes to selecting the right style for your home is understanding your windows’ measurements. If you’re unsure of what size your windows are, be sure to talk to one of our experts, who can help you measure your windows accurately and guide you through the process of finding the right shade for your home.

Energy Efficiency

If you are looking for a window treatment to save energy, blinds and shades are a great option. Their insulated designs trap warm air in winter and cool air in summer, helping you reduce your energy costs without cranking up the AC. Plus, many styles come in a wide range of opacities that block out incoming light from the sun. This means you can still enjoy natural light during the day while keeping your home comfortable and reducing glare.

Blinds are available in a wide range of materials and colors to match your home decor. They can also be custom-made to fit your windows perfectly. That said, they can be a little more expensive than ready-made options. One reason is that they are typically made using cheaper materials. They are also often mass-produced and made overseas, which can be a concern for some homeowners who want to support American workers.

The best option for energy efficiency is to choose cellular or solar shades. These window treatments use cutting-edge fabrics to help reduce your energy bills. For example, cellular shades with honeycomb-shaped pockets trap air, making them effective insulators. They also come in double- and triple-cell designs to increase energy savings. Light filtering and blackout fabrics are also available to give you more control over your home’s temperature. You can also get more control over sunlight by choosing top down/bottom up shades.

You can even earn a federal tax credit for choosing certain energy-efficient window treatments, which is a major benefit to consider. If you’re interested in adding these stylish and energy-efficient window treatments to your home, reach out to us today. We’ll connect you with a local window specialist who can answer any questions you have and set up a free consultation.

If you’re not ready to schedule an appointment, take a look at our extensive online collection of blinds and shades. Just keep in mind that you’ll need to measure the size of your window frames before ordering. If you are ordering blinds or shades for an existing home, this should be relatively easy to do. However, if you’re outfitting a new home or building a home from the ground up, it may be more difficult to measure your windows accurately.
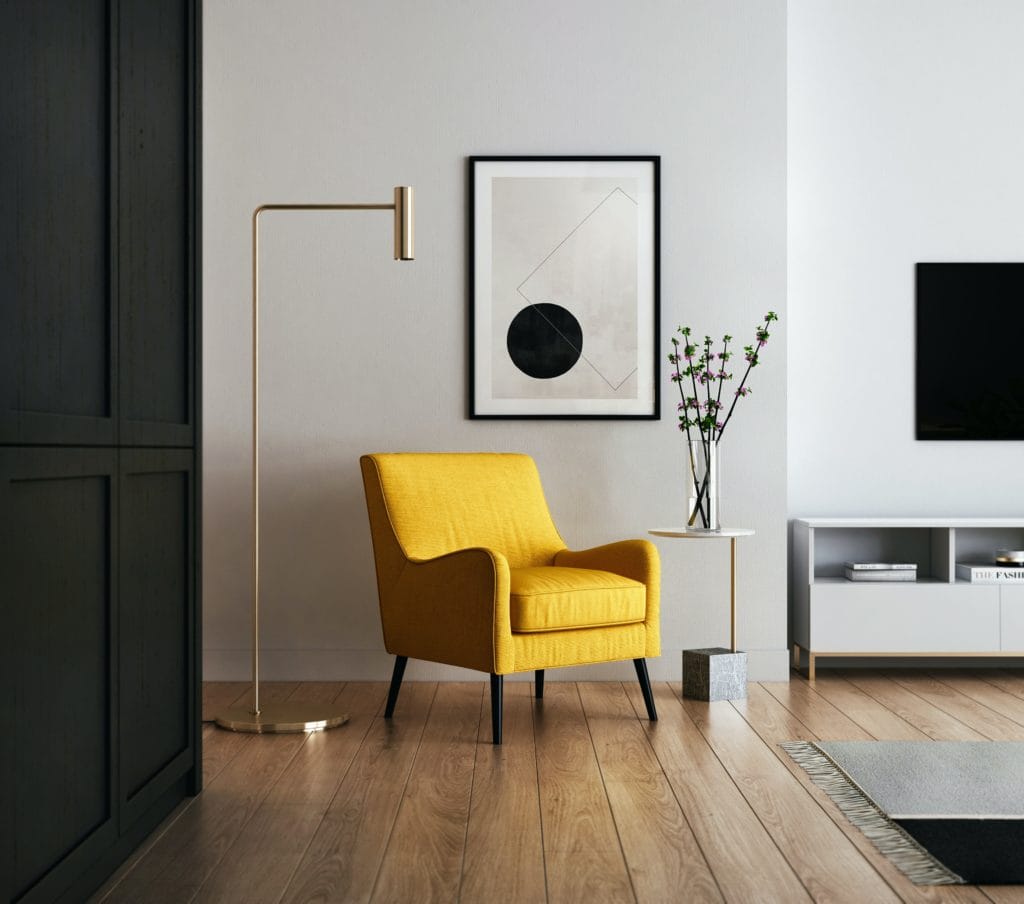
Style

Custom blinds and shades are made to fit your windows perfectly, so they look better than off-the-shelf options that may leave gaps. This makes your home feel cozy and more put together. Additionally, custom window treatments are designed to last longer than off-the-shelf blinds because they’re built to be more durable and sturdy.

While blinds have slats that open to let light in and close to block it, shades are designed with fabric or woven materials that offer varying degrees of privacy and opacity. Both styles are great for manipulating the amount of natural light in a room, but shades are an ideal choice for rooms that need more privacy or UV protection than blinds can provide.

Shades also come in a wide variety of fabrics, textures and colors, making it easy to find a style that fits your design preferences. They are a sleek, modern option that can be customized with features like automation, cordless operation and top-down/bottom-up functionality.

Choose from a wide selection of shades, including honeycomb cellular shades that trap hot and cold air to help reduce your energy bills all year round. For a more traditional, elegant and tropical look, try natural custom woven shades made from bamboo, reeds, grasses or woods.

Other types of custom shades include roller shades, which have a simple, sleek and minimalistic look that can be customized with your choice of colors, patterns, opacity and operating systems. Woven woods and natural fibers, such as jute, rattan and bamboo, also offer texture and a neutral palette to blend with any color scheme or décor.

If you want to make a statement or elevate the aesthetic of your space, try pairing a window shade with a dramatic valance or drapery to complete the look. Regardless of what your goal is for your home, you can create the comfortable and functional living space you desire with custom blinds and shades from Louisville Blinds and Drapery.

Home Improvement

Cabinet Refinishing Basics

Cabinet refinishing is an excellent option for homeowners looking to update their kitchens without spending the money on a complete renovation. However, this process requires some planning.

Cabinet Refinishing

A quality Cabinet Refinishing Modesto Anchor job can add a significant amount of value to your home. It can also make your cabinets feel brand new.

A coat of primer may seem like an extra step, but it’s the best way to ensure your finished project looks its very best. It is also the only way to protect your cabinets from damage and stains in the future, particularly in moisture-prone areas such as your kitchen.

Cabinet paint, which is specially formulated to hold up well in a moisture-prone environment, requires a smooth surface for proper adhesion. Without it, the paint will peel and chip easily. The best way to prevent this is with a quality primer, such as KILZ 3(r) PREMIUM Primer. It not only lays down an excellent foundation for your new finish, but it also provides mildew-resistant protection that is important in a steamy kitchen.

There are many different kinds of primers, so choose one that is compatible with your cabinets’ material (such as wood or laminate) and any staining or other damage they have sustained. Shellac-based primers, such as BIN Shellac Based Primer, work very well for cabinet surfaces and provide strong stain blocking abilities. If you’re painting over a dark color, consider using a high-hiding primer, such as Fresh Start(r) High-Hiding All-Purpose Primer. It’s the go-to choice of many professional painters for drastic paint color changes, and it hides even the most stubborn stains.

Adhesion primers are good for slick surfaces, such as glossy paint or laminate, and provide a solid base for your new finish. They can be more expensive than other primers, but they also provide the best bond to your existing finish and won’t peel or chip as easily.

Latex primers are good for most surfaces, including wood and laminate. They’re a good choice for most DIYers because they’re less expensive than oil-based primers and can be used with a wide range of paints, including low-VOC latex paints.

Once your cabinets have been primed, you can begin the painting process. Be sure to use a mask to protect your face and eyes from spray paint fumes, and always follow the manufacturer’s recommendations for respiratory protection, ventilation, and clean-up steps. Paint can be applied with a brush and roller or a paint sprayer.

Stain

Refinishing adds a splash of color to your cabinetry and enhances the natural wood grain. While stain saturates the surface, it still allows some of the natural wood to show through, depending on your chosen shade. Lighter stains create open and airy looks, while darker finishes add depth and coziness to your kitchen design.

Before you start staining, remove the handles and knobs from the cabinets and wipe down the cabinet surfaces. Clean them thoroughly to ensure the new finish adheres well. You may need to scrub the surfaces to remove grease and other scuff marks. Trisodium phosphate (TSP) mixed with water works well for this task and is readily available as a spray, powder or liquid. Follow all manufacturer recommendations for preparing the surface to be stained.

Thoroughly stir the stain product to distribute the color pigments evenly throughout. If you’re using a gel stain, pour it into a plastic container rather than the can it came in, as this makes it easier to dip the paintbrush bristles into. Starting on the bevels and textured areas of cabinet doors and drawer fronts, apply the stain, working in the direction of the wood grain. Wipe away excess as needed, then move to flat sections of the surfaces. Avoid applying too much stain at once, as this can lead to uneven coloring and blotching.

Allow the stain to dry according to the manufacturer’s instructions, allowing sufficient ventilation to speed up drying and reduce odours. Once the stain is completely dry, you can reattach the cabinet doors and drawer fronts to their hinges. Consider sealing your cabinetry with a polyurethane sealer to enhance durability and protect the finish from damage.

Staining your cabinets is an affordable way to give them a fresh, updated look. However, it’s important to keep in mind that refinishing won’t completely change the appearance of your cabinets. Depending on the original condition of your cabinets and the quality of the work, you may need to refinish them again sooner than you might expect due to pre-existing damage or normal wear and tear.

Topcoat

A topcoat provides a clear, glossy sheen on cabinet surfaces that helps protect paint and wood from damage. It’s best to use a water-based topcoat that is compatible with your painted cabinets. If you’re unsure which type to choose, test the product on a small area of your cabinets or on a piece of wood before applying it to your cabinets.

A high-quality topcoat is a necessary step to ensure your new cabinet paint job looks its best and lasts longer. Look for a product that is specifically designed to be used on cabinets, such as General Finishes High Performance topcoat. This product is durable and fast-drying, and it comes in both oil-based and water-based formulas. It also requires little cleanup after application and is easy to apply with a brush or roller.

Before applying the topcoat, it is important to remove all hardware from your cabinets and prep the surface for painting by removing any sticky residue or debris. Masking tape is recommended to isolate areas that will not be painted, and a drop sheet or other protective covering should be placed underneath your workspace to catch any paint splatters. Once the cabinet face frames and drawer fronts are protected, they can be sanded with medium-grit sandpaper to smooth the surface and improve paint adhesion. After sanding, wipe down the cabinets and clean the sanding dust with a damp cloth or paper towel.

Polyurethane and varnish provide a hard, durable coating that is resistant to moisture damage, scratches, and UV rays. They are typically applied with a brush or roller, and several thin coats are required for maximum durability. Oil-based polyurethane has a slight amber tint and is typically used on wood, while water-based products dry clear and can be used on other surfaces.

Wax and furniture polish can be used as an alternative to polyurethane or varnish, but it doesn’t offer the same level of protection and must be reapplied regularly for optimal results. It does, however, add a natural sheen to the wood and can help prevent moisture damage.

Cleaning

Cabinets are one of the first surfaces that attract messes. Dirty knobs and handles can be a health risk, harboring bacteria such as salmonella, as well as an eyesore. Regular cleaning is important to keep them looking good and preventing build-up of grease, grime and other contaminants.

Use a mild liquid dish soap and warm water to clean cabinets, or combine equal parts of vinegar and water to create a natural cleaning solution that is effective and safe for wood cabinetry. Vinegar is great for removing grease and disinfecting surfaces without damaging the finish. Be sure to rinse with water to ensure no acid is left behind that could cause discoloration over time.

Avoid using harsh cleansers, such as ammonia, bleach, solvents, harsh scouring pads and paint thinners, on finished wood. These can damage the surface and void your warranty. If you find a particularly stubborn stain, try mixing baking soda with a little water to make a paste. Apply this to the stain and allow it to sit for a few minutes. Then wipe it away with a damp cloth. Rinse the surface with clean water, and dry with a soft cloth.

If you notice a sticky residue on cabinet hardware, soak the knobs and handles in warm soapy water for a few minutes. Then wipe them with a clean damp cloth and let them dry completely before reattaching them to the cabinets.

A non-drying oil, such as olive, coconut or tung oil, can be applied to wood furniture to help protect it from moisture damage and discoloration. When using these oils, be sure to wipe up any excess afterward, as they can leave a film that attracts dirt and dust. Avoid using waxes or other self-polishing products on cabinetry, as they can build up over time and create a dull appearance.

Home Improvement

Preparing Your Home for Interior Painting

Interior Painting San Diego is a very important part of a home’s decoration. When done right, it can give a home a whole new look and feel. It can also add to the overall value of a home. But before you decide to have interior painting done, there are a few things you should consider.

Interior Painting

If you’re planning on painting your home, there are some preparation steps to consider. Taking the time to prep your walls will ensure that your paint job is as smooth and professional looking as possible. Whether you’re doing the job yourself or hiring a professional, preparing your space will make the process go smoother.

First and foremost, you need to determine the size of your space. Having a rough idea of what you have to work with will help you determine what kind of supplies you need. You can also rely on professional painters to give you a good estimate of how much work you’ll need to get your home looking fresh and new again.

The next step in preparation is to identify the problem areas. This is best done by putting together a list of the worst offenders, ranging from peeling paint to general wear and tear. After identifying the problem areas, you’ll need to do the proper maintenance to keep the problem from recurring.

Choosing the correct colors and a high-quality primer will make sure your walls are covered. Depending on the size of your space, you may need to consider using a professional for the heavy lifting.

Choosing the best quality paint for your home is important because it will determine how long the color will last. It’s also worth noting that a professional will be able to remove any old paint that’s on your walls. Also, if you have a pet or children, you’ll need to take special precautions to avoid damage.

Lastly, consider the cost of your paint job. You’ll save a lot of headaches if you pay for the finest material you can afford.

When you decide to redecorate your interior walls, it’s important to choose the right paint finish. There are a number of different types, each with its own benefits.

For example, satin finishes provide a silky, velvety look. They also help hide flaws on walls. These types of finishes are durable and easy to clean. However, they’re not as resistant to moisture and mildew as higher-gloss finishes.

High-gloss paint finishes are a good option for painting around doors or cabinets. They offer a glass-like finish that can be used to add extra durability to high-traffic areas. But these paints are harder to apply than lower-gloss finishes. This can be problematic if you apply them improperly.

Another type of paint finish is flat. Flat paint has no shine. It’s also porous, so it won’t hold up well to regular washing.

Some people prefer a high-gloss paint finish, which provides a glossy appearance. The shininess of a paint finish affects the amount of light it reflects. This can be beneficial in rooms with a lot of natural light.

Eggshell finishes are another popular choice. These are less durable than semi-gloss or satin finishes, but they offer a velvety shine. Though not as clean as flat or satin, they still cover imperfections.

High-quality paints have more resins, which helps ensure a longer-lasting paint. Additionally, these finishes are more forgiving of touch-ups.

If you’re planning to paint your home’s interior, you’ll want to know how much it will cost. There are a variety of factors that can affect the price, including the size of your home, the number of rooms you plan to paint, and the type of paint you use.

Home Improvement

Planning a Kitchen Remodeling? Here’s What You Need to Know

When you’re considering Kitchen Remodeling Kansas City there are a lot of things to consider. You want to make sure that you have enough space, and you also want to make sure that you have enough storage space. You should also look into the cost of remodeling your kitchen. In addition, you should consider the design of your kitchen as well.

Kitchen Remodeling

Major kitchen remodels usually more expensive than minor remodeling projects. Major kitchen remodels reconfiguring layouts, replacing appliances, installing new countertops, and installing custom cabinetry.

Labor costs are also a factor. Depending on the extent of the work, you might need a plumber or licensed electrician. These expenses can be thousands of dollars. Fortunately, the National Kitchen and Bath Association offers advice for budgeting and recouping remodeling costs.

When budgeting for major kitchen remodels, you should determine what elements are most important. You’ll want to avoid adding extras. The cost of ornamentation can add up fast. You can save money on these items by purchasing stock items, such as cabinetry.

You can also save on your kitchen remodel by sticking with your current layout. This will reduce the amount of plumbing and electrical work required.

If you have a large budget, you might be able to remodel your dining room as well. You’ll also be able to add a kitchen island to serve as a seating area.

If you plan to remodel your kitchen with a HELOC, make sure you research the cost of each step. The interest rates may vary, and you will also have to pay closing costs.

To save money, you can choose to buy pre-made, stock cabinets or reface your own. A quality kitchen can hold a buyer’s attention and increase your resale value.

The cost of remodeling a kitchen depends on the size of your kitchen, the materials used, and the work involved. It can range from $100 to $250 per square foot. The most expensive flooring is ceramic tile. On the other hand, vinyl flooring is the least expensive.

In remodeling a kitchen, the first step is choosing the right layout. The floor plan of your kitchen determines the functionality of the space. It will also influence the style of cooking, socializing, and entertaining. There are many kitchen layouts to choose from, but each has its advantages and disadvantages.

If you are planning a remodel or building a new home, you may have several questions about kitchen layouts. It is important to choose a layout that is functional, comfortable and will enhance your life.

There are five main kitchen layouts, each with its advantages and disadvantages. Each is beneficial for certain spaces, however, so you will need to consider the size of the room and how it is oriented before selecting a layout.

One of the most popular kitchen layouts is the L shape. It offers ample counter and dining space and provides flexibility in the placement of appliances and countertops. In addition, the L-shape layout can accommodate two workstations at once. It is particularly useful in small to medium-sized kitchens.

Another common kitchen layout is the horseshoe. This design is similar to the L-shape, but it has an extra wall that adds more storage and workspace. It is a versatile kitchen design that can be used in large or small homes.

The classic kitchen triangle was formed by the range, sink, and refrigerator. Modern kitchens have multiple cook and service zones, but the classic triangle remains. A peninsula counter can block the middle of the triangle and prevent unnecessary traffic in the workspace.

If your remodel includes a kitchen island, you will need to make sure that it has the proper square footage. You will also need to consider the amount of clearance between the island and the center of the triangle.

Choosing countertops for your kitchen is an important decision. You should consider your lifestyle, the style of your home, and the materials that best suit your needs. It’s also important to find countertops that will last. The best ones are durable, resistant to staining, and easy to clean.

Granite, marble, and quartz are the most common countertop materials. They are aesthetically pleasing and are resistant to stains, heat, and bacteria. However, there are other materials that are worth a closer look.

Home Improvement

How Residential Painting Can Improve the Look of Your Home

Whether you’re painting the exterior of your home, or the interior, a residential painting service can make a huge difference in the look of your home. This type of service requires a lot of skill and hard work, but the results are well worth it.

Residential Painting

Having your commercial property painted by the pros is the best way to ensure your business stands out from the rest. For one, it can improve productivity among your employees. It can also give you the peace of mind to concentrate on other aspects of running your business. Depending on the size of your commercial property, you may need to hire some specialty equipment to get the job done.

The best time to paint your commercial property is during the day since this will give you the most daylight. However, you may want to think twice about painting in the dead of winter. It can be difficult to find qualified painters in a snowy climate. This is a particularly good time to negotiate prices with your painting contractor.

The best way to get the most bang for your buck is to do a cost comparison between using a professional and doing the job yourself. There is no doubt that you are paying for a service, but by negotiating a price that is in your favor you can save money in the long run. Using a professional painting company can also help ensure your commercial property is spick and span, which will also improve your bottom line.

The best time to paint your commercial space is during the day since this will give your employees more daylight. Depending on the size of your property, you may need to hire some specialty painting equipment to get the job done. It can also be difficult to find qualified painters in crowded areas since this will also improve your bottom line. Using a professional painting company can help ensure your commercial property is spick splotch free, which will also improve your bottom line.

Whether you are remodeling your home or just want to freshen up the exterior, painting your home can be a cost-effective way to get a new look. It is also a way to increase the value of your home. Painting can also make your home more attractive to potential buyers and can help to prevent costly repairs. It is also a great way to add personal touches.

If you have a home that needs to be painted, you can hire a professional to do the job for you. A professional painter can change a peeling or damaged home into a beautiful piece of artwork. A good quality paint brand can provide better coverage and a more consistent look. The quality of paint also plays a role in how much paint you need.

The amount of paint that you need for your home will depend on the size of your home. The more paint you need, the longer it will take to complete your project. Typically, painting the exterior of a home requires about 2,000 square feet of paintable area. Depending on the type of paint you want, you may need to do several coats.

Before you begin painting, you will need to do some prep work. Prep work includes cleaning, repairing, and sanding. This helps the paint to adhere to the surface and reduces the number of coats you need. Also, if you are painting an exterior, you will want to use plastic sheets to cover windows and doors.

You will also need to purchase paint, drop cloths, and other equipment. If you need to purchase paint, you will want to shop around. You can get a better deal on paint by choosing a quality brand. You can also save money by bundling paint jobs.

Unlike commercial painting, residential painting is more focused on smaller house projects. Usually, residential painting teams are composed of experienced individuals who are flexible with their client’s needs. Their work can involve different kinds of projects, from exterior to interior elements. Their services include painting ceilings, walls, decks, fences, and even aluminum siding. These teams also offer additional services, including plastering, metalwork, and stucco.

Home Improvement

How Much Does It Cost to Do Interior Painting?

The cost of professional interior painting depends on a variety of factors. These include the square footage, number of rooms, and amount of paint to apply. Additionally, the interior painter will have to make any necessary repairs to the walls, ceiling, or trim before they begin the painting process. The more preparation the painter does beforehand, the lower the final cost will be. Prep work may include wall patching, baseboard caulking, or spackling.

Interior Painting

Professional interior painters typically charge between $2 and $6 per square foot. This means that a 1,000-square-foot home could run anywhere from $2,938 to $14,000. However, the price can also vary based on the type of paint used. Moreover, the cost may be higher if you have water stains or dark walls that need to be covered.

The cost of professional interior painting depends on the style and number of rooms in the house. A two-bedroom apartment can cost up to $2,700, while a two-bedroom condo will cost between $2,700 and $5,000. In addition, it is important to consider the layout of the space and the size of each room to determine the overall cost.

While it may be tempting to save money by painting the interior walls yourself, it is wise to hire a professional. This will save you time and money. Besides, the professionals will also be able to clean the surfaces and apply primer to them. These steps are essential for the finished result to look like a showroom.

The average cost of interior painting for a two-bedroom house is $3,000-$4,000. This includes labor, materials, and the cost of the paint. A two-bedroom home is easier to paint than a four-story home and will require less time and labor than a five-bedroom one.

The cost of doing interior painting can vary depending on the location, size of the room, and amount of paint used. The price will also depend on whether or not you are painting ceilings, trim, and walls. More work is required to prepare walls for painting, including spackling, baseboard caulking, and wall patching.

Generally, professional painters charge between twenty and fifty dollars per square foot. However, they may charge by the hour, so the price can vary greatly. If you are looking for a lower-cost alternative, you can consider hiring a handyman to help you. Handymen may be able to do a small painting job for $200 or less, depending on the size and scope of the work. Student painters can also be hired for a lower price, but make sure they have some work experience and are working under a reputable foreman before hiring them.

Preparation work is essential to a great paint job, but it can add up. Professional painters will also use drop cloths, rollers, and caulking. You’ll also need to buy paint brushes, rollers, and tape, which can easily add up to $100 or more.

Before hiring a professional, make sure to get at least three estimates from different painting companies. Compare the costs of the materials, labor, and the time it will take them to complete the job. Make sure to read and understand all the information included in each quote. You should also get a written contract, as well as ask questions about their insurance.

Doing it yourself will save you money, but it is a tedious process. While you can save money, it won’t be as beautiful as the professionals. Moreover, the DIY painting will take twice as long and will yield inferior results. But if you don’t want to deal with the hassle, consider hiring a professional.

The professional painting will cost you around $650 to $1,000. However, the cost can vary depending on the number of rooms and the type of paint used. It may cost as low as $200 to $300 for a small apartment or as high as $2,938 for an entire house. Regardless of the size of the house, interior painting is an easy way to give it a new look without major construction or remodeling.

Home Improvement

Home Construction Service Suppliers Act Protects Homeowners

home construction service

Well, here is the main thing about construction. The construction phase of a new home can take months. The length of time it takes depends on the size of the house and its complexity. Nevertheless, the construction phase can be one of the most exciting parts of building a new house. During this time, you will have the chance to get regular updates and ask questions if you have any concerns.

A home construction service contract is a contract between the owner and a supplier for the construction of a residential building. However, it does not cover construction on a structure with four or more dwelling units or on the common area of a condominium property. Rather, it covers residential buildings with a single or multiple dwelling units.

While there are a few protections in the CSPA, the HCSSA does little to protect homeowners who enter into cost-plus contracts. These types of contracts charge homeowners for all of the cost of the construction, plus an additional amount, and do not have a cost cap. As a result, the costs may be much higher than the homeowner expected. If you want to avoid this scenario, you should make sure that you sign a contract with a home construction service that has the protections of the CSPA.

When choosing a home construction service, you should first determine what kind of work you want to have done. Some contractors have relationships with architects and designers, while others will handle all the work on their own. In either case, be sure to get detailed specifications and drawings in writing before hiring a contractor. You should also be clear about the color schemes and specific requirements you have for the work.

When hiring a home construction service, you should also verify that the contractor is registered or licensed in your city or county. While many cities do not require contractors to be registered, some counties oversee registration for all areas of the county. In case of doubt, you can contact the local building department and ask if there are any requirements that must be met before hiring a contractor.

Home Improvement

Shower And Tub Installation: What To Expect When You Have A New Bathroom

Whether you are planning to remodel your current bathroom or add a new bathroom to your home, there are many factors to consider when setting up a shower and tub. This is why it is essential to use a qualified professional company that can handle all of your project needs and delivers the design you are looking for. A bathroom remodeling project can be a very time-consuming project, and certain variables should be taken into consideration. This includes finding a company that you can trust and who has experience working on the type of design you have in mind. Here are some tips to help you find the right contractor to complete your shower and tub remodeling:

remodeling

– Ask around. Many people don’t realize how important it is to choose the right plumber for your Bathroom Remodeling Alexandria VA project. If someone you know has recently used a company that did a poor job installing their shower and tubs, then you should avoid them at all costs. Check with your friends, family members, and neighbors to see if they were satisfied with the job they did. Always ask for references as well. Only hire a licensed and insured plumber to do any installation in your bathroom.

– Consider the vanities. Shower and tub installation are not the only things that take place in your bathroom. Your bathroom design also includes the vanity unit and your faucets. You need to decide what type of vanities you would like as well. For instance, a contemporary design can include a contemporary-style sink, countertop, faucets, and vanities that have clean lines. These types of designs will tend to be more expensive than traditional bathroom designs.

– Consider your plumbing. While most people think that this applies to just the shower and tubs, when it comes to shower and bathtub installation, it is also worth considering your drainage system, pipes, faucets, and so on. New shower and bathtub installation may require more plumbing work than you anticipate, and in some instances, a plumber may need to come in and do the entire job.

– Consider your space. Bathroom sizes have been increasing over the years, and your bathroom should be able to handle larger showers and bathtubs. This doesn’t always mean that you will necessarily have to get a larger shower room, although sometimes it makes more sense to expand an existing bathtub into a larger shower area. It’s a good idea to measure your space before you start remodeling your bathroom.

– Choose the right fixtures. Some shower and tub installations require you to get brand-new fixtures. The best way to go about this is to sit down with your remodeling contractor and discuss what would look best in your bathroom. From showerhead fixtures to soap dishes and mirrors, your contractor can give you pointers and examples about what would look best in your bathroom.

– Hire a plumber. There are times when you will need to hire plumbing installation services to help you with your shower and tub setup. Whether you want new shower doors or new fixtures in your shower area, a plumber can help. If you have questions or concerns about your shower and tub setup, it might be wise to ask your contractor for advice.

Your bathroom plumbing needs to be done right the first time. Otherwise, you risk replacing or repairing it later, putting a hole in your budget, or delaying the remodeling job. Don’t put off the remodeling. Get it done right the first time, and you’ll save money on any future problems. Make sure that your plumber understands how your plumbing works and has done past work in your bathroom. Only hire a licensed and insured plumber who is bonded and has a good track record.

Home Improvement

Choosing Siding Contractors

When choosing to side with your home, it is important to choose a licensed, bonded, and insured contractor. They should also have experience with the specific siding product you’re looking for. Siding Contractors offer free consultations for potential clients. If you’re not sure whether siding is the right choice for your home, contact us for a free estimate.

siding contractors

There are many benefits to vinyl siding, including the fact that it requires less maintenance than other types of siding. This type of siding does not need to be painted or stained, and it maintains its protective properties. In contrast, wooden siding is prone to rotting and losing its protective properties if exposed to the harsh Buffalo weather.

When choosing vinyl siding contractors, you want to look for companies with years of experience. This will ensure that they have experience in a variety of projects and have a good reputation. It is best to choose a company with at least 15 years in business.

Aside from having a long history in the field, a vinyl siding contractor should also be able to solve any problems that might come up during the installation process. Although some skills are learned in the initial training, the best contractors will be able to solve virtually any issue that may occur during the installation. In addition, licensed contractors will have the proper insurance to protect homeowners from any problems.

The installation process begins with a thorough inspection of the exterior of your home. A contractor will measure areas that will need new siding and check for any hidden damages that might have occurred since your current siding was installed. The contractor will then make recommendations regarding a solution to any problems found. Once the contractor has completed a thorough inspection, he or she will deliver the materials and begin the project.

Fiber cement siding is a popular choice for homes. It has many advantages, including excellent durability. Many architects and designers now opt for it when designing building projects. It is also recognized by the National Association of Professionally Accredited Contractors (NAPAC) and comes with warranties on both material and labor. Its installers must wear protective gear when cutting and handling it. Fiber cement siding is also prone to cracking and can absorb moisture, so contractors must have experience with it. Regular maintenance is also needed to maintain it.

Before hiring a fiber cement siding contractor, make sure you vet them thoroughly. The best way to do this is by contacting a local contractor who has provided service in your area for some time. It is important to check their license and ask to see previous work history. Ask how long they have been in business and whether they have experience with fiber cement siding. Always choose a contractor with a long track record in the area and good reviews from past clients.

While you can hire any licensed contractor, it is best to find a siding specialist who specializes in fiber cement siding. It may not be possible for a licensed contractor to install fiber cement siding correctly. Incorrect installation can lead to costly repairs, and it is disappointing for the homeowner. A siding specialist will have experience installing the siding and will be able to give you quality service and a warranty.

When choosing the side for your home, you have many options. There are vinyl, fiber cement, and wood siding. Vinyl siding is the most common type, but fiber cement is another type that can be used in your home. Fiber cement siding is extremely durable and ideal for homes in harsh climates. It is also easy to maintain.

If you’re looking for a more natural look, you can opt for wood siding. Wood siding is usually characterized by a rustic appearance. It can be left in its natural state, stained, or painted. It also has a variety of profiles and colors. In addition, wood siding is one of the most affordable options. A 2000-square-foot home will cost anywhere from $8900 to $25,000. In addition, stone veneer siding is another popular choice because it’s lightweight and inexpensive.

Home Improvement

Cabinet Refacing – How To Improve The Look Of Your Kitchen Without Spending A Fortune

Considering cabinet refacing? Often it is the best way to improve the look of your kitchen and save money at the same time. The process of cabinet refacing includes covering the inside of your cabinets with a new type of material and installing new doors, drawer fronts, and hardware. If your cabinets are in poor condition, cabinet refacing is also an excellent way to salvage the boxes and reduce the amount of waste. However, cabinet refacing is not a cure-all for a bad kitchen design.

cabinet refacing

While the task of installing new cabinets is not difficult, refacing them can be even more challenging, since the job requires knowledge of the materials and tools. However, it is important to note that cabinet refacing should be left to professionals because even if you are skilled, mistakes and inexperience could quickly eat up your savings and make the project take longer. In addition, if you don’t know how to do it properly, you can end up with a look that is less than desirable.

Before refinishing your cabinets, make sure that the contractor you hire has a license and insurance. While refacing may require no permits, you should still choose a contractor who is licensed and insured. They should have a good understanding of the materials used and whether or not permits are required. Moreover, they should be knowledgeable of recommended materials and what their process entails. You should also ask if any interior work will be included.

In addition to replacing cabinet “skins,” refacing includes replacing old cabinet doors and drawer fronts. The old cabinet doors and drawer fronts are removed but the boxes are left intact. The new veneer is applied to the exposed sides and ends of the cabinet boxes. The process typically takes two to four days. This is a long-term project, so be sure to schedule the project well. This job will make your kitchen look new again!

When choosing a material for refinishing, consider your budget and the design of your cabinets. While refacing will give you a new look, veneering won’t last nearly as long as brand-new cabinets. Besides veneering, you can also choose from other types of materials. Rigid Thermo foil, for example, is made of vinyl foil molded over MDF doors. These have a more realistic wood grain aesthetic, but fewer solid color options than plastic laminates. Plastic laminates can be used for cabinet refacing, but are best suited for plain-looking cabinets.

When it comes to refacing, you should know that the entire process can take as little as five days if done by a professional. This way, you can finish refacing one drawer or a whole cabinet on a weekend. Remember that refacing cabinets is usually completed in less than five days, depending on how long the installation takes. If you are in a hurry, you can complete this task on a weekend. However, it is important to note that you should consult with a professional before undertaking this project.

Refacing is a process where you remove the cabinet elements, including drawer fronts and doors. The cabinets themselves can be salvaged. Then, you can replace the drawer fronts, door hinges, and cabinet doors. Some cabinet refacing projects require an interior work evaluation. A professional will know which materials and techniques are best for the job and advise you accordingly. The process should take from three to five days, though you can finish one drawer at a time.

Another benefit of cabinet refacing is that it’s a smaller-scale project, but it gives you all the benefits of a complete makeover. Not only does it result in a new look and feel, but it also saves you money. It’s also far less disruptive than a full-on remodel. In addition to saving you money, cabinet refacing allows you to use your kitchen during the process. A full kitchen makeover can be a huge undertaking.